Using Mesh Contacts

Mesh Contacts are deformers that deform a mesh as though it was being squeezed out by another mesh item.

  1. Select a mesh item.
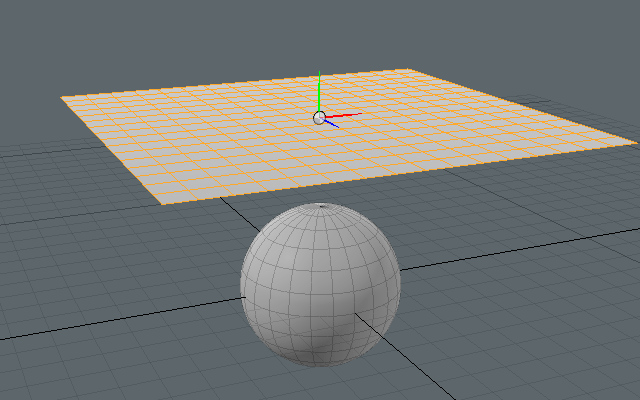
    Here we created a primitive [Plane] and [Sphere] and selected the plane item.
    Please increase the number of mesh [Segments] for the plane item.

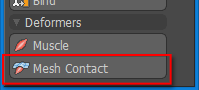
  2. Click [Mesh Contact] in the Main Palette.

  3. A Mesh Contact was applied.
    The P_MeshContact applied to the mesh can be checked by clicking the "+" icon in the Items list. A P_MeshObserver is set as the parent of the P_MeshContact.
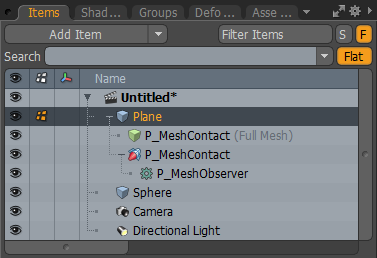
  4. Set a [Contact Item]
    We set the sphere item in [Contact Items] in the P_MeshContact Properties.
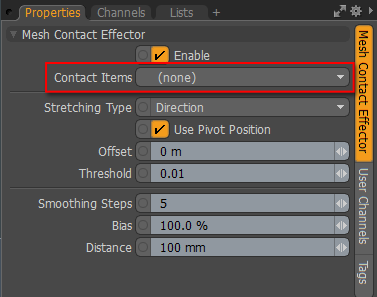
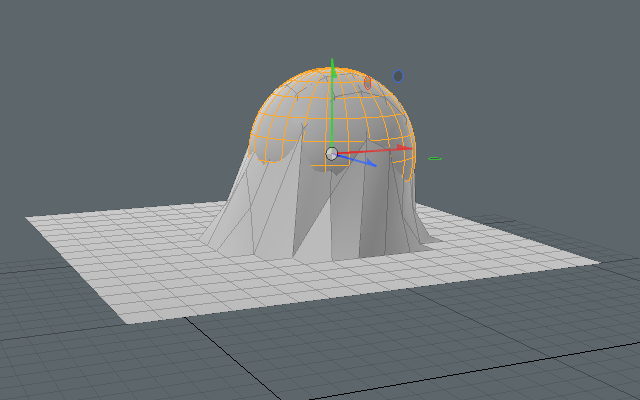
  5. Setting the Mesh Contact is complete.
    We move the sphere and plane items so that they are touching. The plane item is pushed out by the sphere item's mesh.
    When using both muscles and mesh contacts at the same time to build animations, please make finely segmented meshes for both the muscles and mesh contacts. Roughly segmented polygon meshes will cause large polygon deformations which may in turn cause flickering.

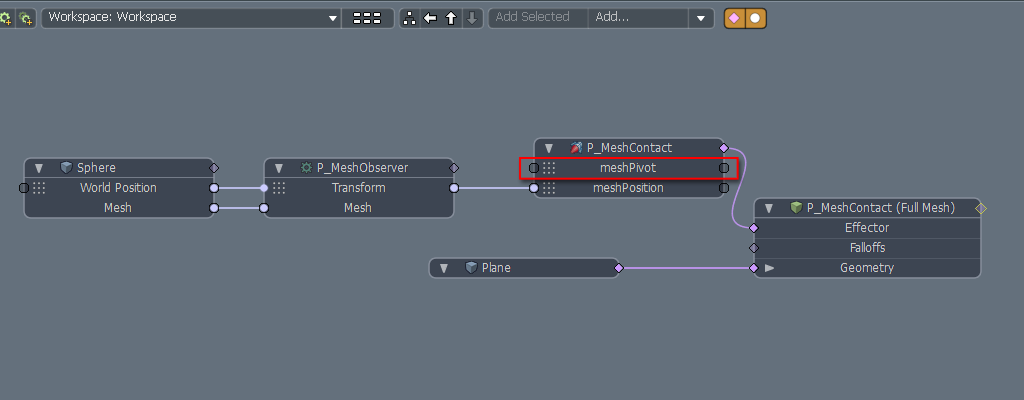
    You can link a matrix to the [meshPivot] to be able to use it for the origin for pushing out items.
    Please refer to SampleFilesDeformerMeshContact_Logo.lxo for an example using [meshPivot].

Tutorials

About CharacterBox

Videos

PSOFT CharacterBox
PSOFT YouTube Channel

  1. Introduction to the "CharacterBox" MODO Plugin (Live video broadcast March 3, 2017. In Japanese.)
  2. Character Rig Creation
  3. Rig Functionality
  4. Copy and Paste
  5. Muscles
  6. Weight Meshes
  7. Combination With MODO's Standard Functionality
  8. Exporting to FBX Format
  9. New product sneak preview
  10. Symmentry Items Selection
  11. Soft IK Strength
  12. Sync To Goal Rotation
  13. Support for Scaling Rigs
  14. Mirror Weight Tool
  15. Symmetric Editing Tool
  16. New Standalone icense Tool
  17. Muscles Support Locators
  18. Copy Skelton Size
  19. Symmetry Tags
  20. Relocate SPIK Controllers
  21. Support for Action Layers

CharacterBox Tutorials
Creator: Artist - Matt Meersbergen

  1. Biped Rigging Introduction
  2. Biped Rigging Introduction
  3. Character Mesh Prep
  4. Hips, Leg and Feet IK/FK setup
  5. Spine, Arms and Fingers setup
  6. Episode 6 Face Rig
  7. Episode 7 Binding Mesh
  8. Eye Controls
  9. Actors, Actions, Poses explained
  10. Snake - Basic Rig setup
  11. Speed Test
Modo and Character Box and Cloud rendering