Here we explain the sequence from constructing rigs using CBOX to completing the preparations for creating animations.
Setup Sequence
The setup sequence using CBOX is the same as when using Modo or other 3D software. The general flow is as described below.
We explain each step in the setup sequence of a human-shaped character in the following paragraphs.
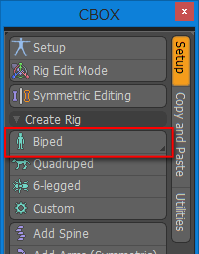
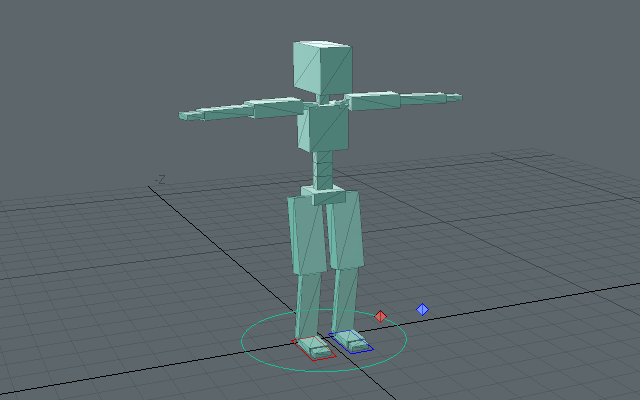
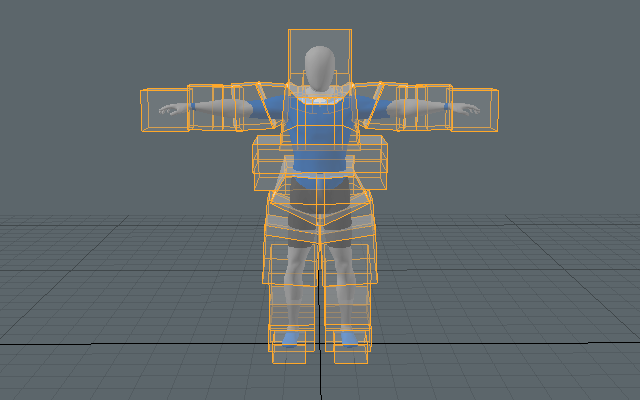
1. Create Character Rig
We create a character rig.
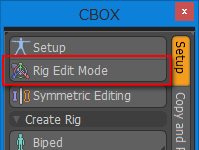
- We click [Biped] in CBOX's main palette.
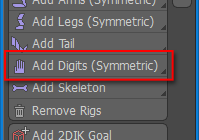
- We add digits rigs.
We select a skeleton item from either the left or right arm rig.
We click [Add Digits (Symmetric)] in the main palette. Clicking [Add Digits (Symmetric)] also adds 5 digits rig to the other arm rig in the pair.
If you wish to reduce the number of fingers, select the extra digits rigs and click [Remove Rigs].
Digits rigs can be used for all kinds of purposes. We recommend them for use in hair, skirts, etc.
- We finished our character rig.
You can edit the [Number of Joints] as required.
You may find it useful to enable [Remap Delete Key] when constructing rigs.
Enabling [Autoselect Modifiers] is also useful for editing the properties of the modifiers controlling the rigs.
2. Edit Joint Positions
We edit our skeleton to match the positions of the joints in our character model.
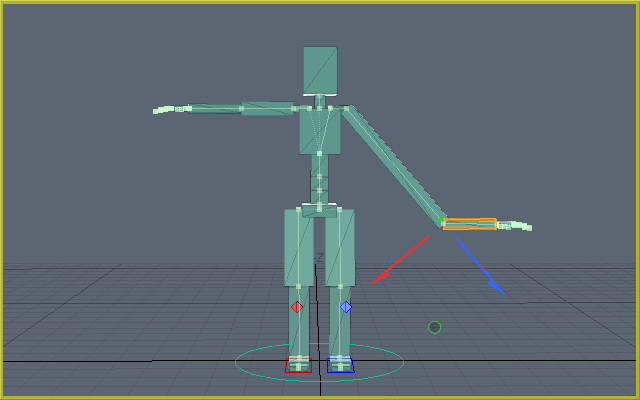
- We enable rig edit mode.
By clicking [Rig Edit Mode] in the Main Palette, we switch to Modo's Setup Mode. A yellow frame is shown around the 3D viewport while in Setup Mode.
In Setup Mode, the links between CBOX rig items are shown with lines.
Rig edit mode is useful for editing the positions of joints. When moving a skeleton item with the [Move] (W) tool while in rig edit mode, the parent skeleton of the skeleton that was moved is rotated automatically. This functionality is for setting the rotation axis in accordance to 2DIK requirements. 2DIK requires the Z-axis to face the child item.
- About the Setup Mode
CBOX rig functionality maintains separate sets of values for values in the Setup Mode and values in the Edit Mode (when Setup Mode is disabled). The Setup values are extremely important for moving CBOX rigs. Please be careful since deleting values and overwriting values can cause the rigs to stop functioning correctly. - We move the skeleton to the joint positions of the model.
Please edit the skeleton with the [Move] (W), [Rotate] (E) and [Scale] (R) tools.
You can use the [Symmetric Editing] tools or Copy and Paste Posture from [Copy and Paste] in the Main Palette to make skeleton positions symmetrical.
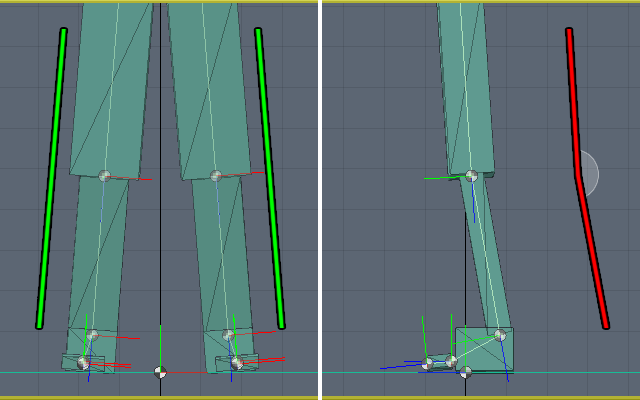
2DIK in CBOX operates by first rotating along the X-axis. Next, it rotates along the Y-axis. If you wish to specify the rotation direction of joints in 2DIK, use Setup Mode to set the X-axis according to the desired rotation direction and set the angle in [Rotation] beforehand. There is no problem with small rotation values of 1° to 5°. With 2DIK, better results are usually obtained by avoiding values such as 0° and 90° and setting even just a small angle value to the axis along which we wish to rotate. * Please note that IK won't work properly if all the angles of the skeleton are set to 0°.
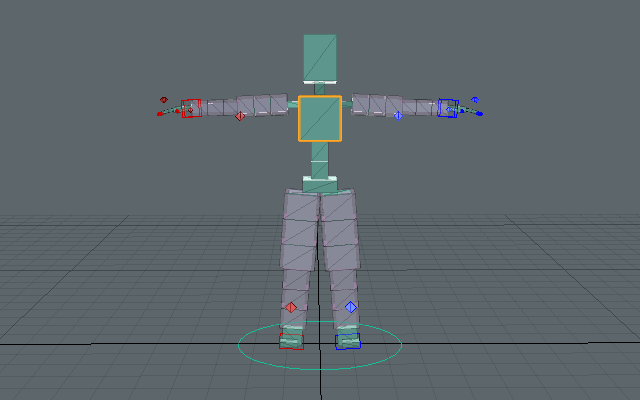
For example, for leg rigs, we lightly bend the knees along the X-axis like in the images below. We set the Y-axis to 0°. By using such settings, 2DIK will rotate along the X-axis.
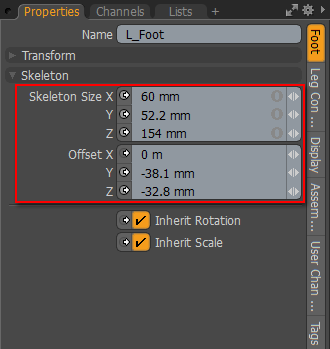
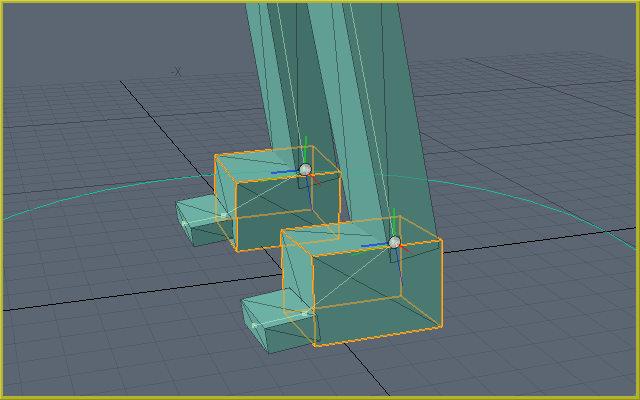
- We define the [Pivot Positions] for the foot and hand items using
[Skeleton Size].
[Skeleton Size] for foot and hand items is used to define the pivot positions of the P_Palm and P_Tiptoe modifiers.
[Pivot Position] is a facility that defines the coordinates used as the rotation origin when rotating 2DIK goals. For example, by setting [Toes (Auto)] to [Pivot Position] and rotating the 2DIK goal along the Z-axis, we can rotate the foot, from the grounded state, with both toes extremities as the origin.
If we wish to set the same size to the left and right skeleton sizes, we can use [Copy/Paste Skeleton Size].
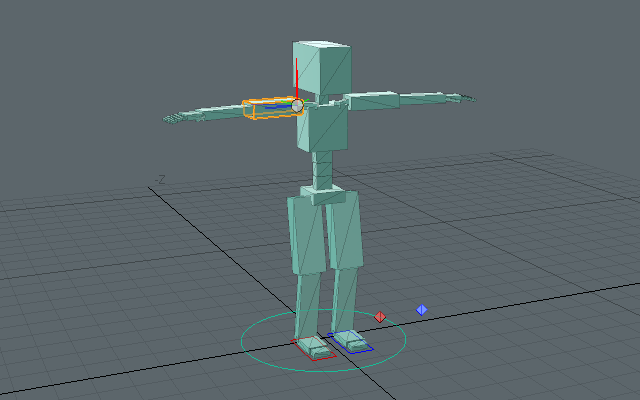
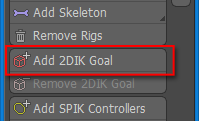
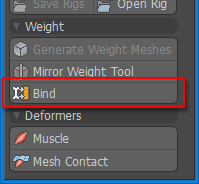
- We add 2DIK goals.
We select the rig items to which we will set 2DIK goals. Here, we first select the left and right fingers and arms and then click [Add 2DIK Goal] from the Main Palette. As a result, 2DIK goals and up-vector items are added to the selected arm and finger rigs.
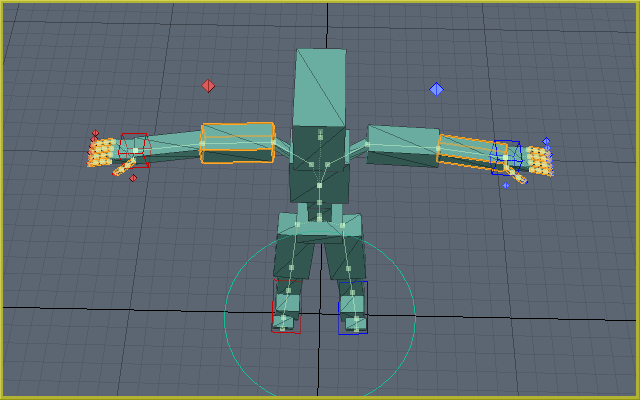
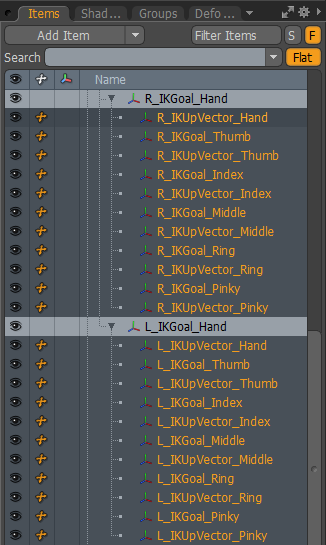
- We set the parent-child relationships for the 2DIK goals and up-vectors.
Here, we set the 2DIK goal items of the arm rigs as the parents of the finger rigs' 2DIK goals and up-vectors. By doing this, we set the fingers' 2DIK goals so that their movement and rotation follow the movement and rotation of the arms' 2DIK goals.
CBOX sets the parents of newly added 2DIK goals and SPIK controllers to the RootItem.
You can freely modify the parent-child relationships of 2DIK goals, up-vectors, SPIK controllers and muscle controllers using the Items list*. Please use the [Setup Mode] when modifying parent-child relationships.
* Please take care not to edit the parent-child relationships of skeleton items with the Items list. Because CBOX skeleton items are controlled by channel modifiers, rigs will stop operating correctly if the skeleton items are assigned parents from another level. Similarly, please do not move rig items from the child level of [RootItem] using the Items list. CBOX restricts the targets of copy and paste and rig additions to children of [RootItem].
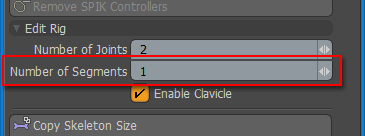
- We add segments.
Adding segment skeletons is an efficient way to make arms and legs twist smoothly. We change [Number of Segments] in the Main Palette from 1 to 3. This adds pink semi-transparent skeleton items. Control for twisting segment skeletons is done with channel modifiers.
Adjust the position of the segment skeletons as required.

- We finished setting the positions of the joints.
In addition to the positions of the rig's skeletons, please also set the positions and rotations of 2DIK goals, up-vectors, SPIK controllers and muscle controllers. Once the positions of all the rig items are decided, we execute [Set to Initial Posture].
Usually, we would make adjustments by repeating the process of adjusting the joints positions and setting to initial posture multiple times. The positions of the skeleton items can also be adjusted after building animations, but it is best to finish setting the positions of the controllers before starting to animate.
3. Set to Initial Posture
We set the initial posture for the controllers of our character rig.
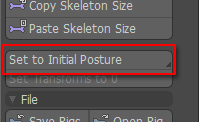
- We set to initial posture.
After we finish setting the joint positions of our rig to match our model, we click [Set to Initial Posture] in the Main Palette.
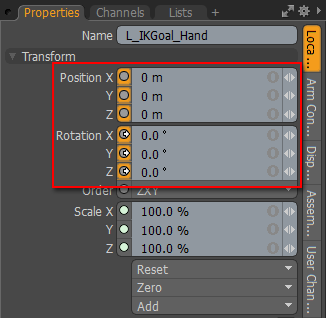
When executing [Set to Initial Posture] in the Setup Mode, the transforms of the controller items are zeroed*. This is the same behavior as Modo's [Zero].
When Setup Mode is OFF, [Zero] sets the values of the [Position] and [Rotation] transforms to 0 for 2DIK goals, SPIK controllers, muscle controllers, hub items and skeleton items. It affects CBOX items that are not controlled by channel modifiers.
The benefit of using [Zero] is that keyframe values can be handled relatively. For example, for characters that have different physiques, the positions of the IK goals change according to the length of the hands and feet. In such a case, by executing [Zero], animations can be reused by scaling keyframes since the movement amounts can be handled relatively.
Also, the fact that [Resetting] transforms returns to the Setup Mode posture can be useful.
* Please avoid using Modo's standard [Zero] for rig items controlled by channel modifiers. A zero transform is added to the channel modifier calculations, causing the rig to not behave as intended.
When you add rigs and controllers after completing [Set to Initial Posture], use [Set to Initial Posture (Selected Items Only)].
If you edited the controller positions in Setup Mode after creating keyframes and wish to "Zero" the transforms with the positions after edition, click [Set Transforms to 0].
If you execute [Set to Initial Posture] in Edit Mode, the rig posture from Edit Mode is adopted as the [Setup Mode] initial posture. This is effective when you wish to adjust indirect positions using 2DIK.
4. Rename Skeleton Items
We change the names of the skeleton items.
- We change the names of the skeleton items.
CBOX can set the names of skeleton items. Set the item names freely.
The skeleton item names are used as the names of the weight maps generated when executing [Generate Weight Meshes]. Please define the skeleton item names before executing [Generate Weight Meshes]. The skeleton item names and weight map names are also used to execute [Bind].
When building scenes with multiple characters, it is preferable to use item names that are not duplicated between characters.
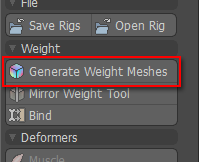
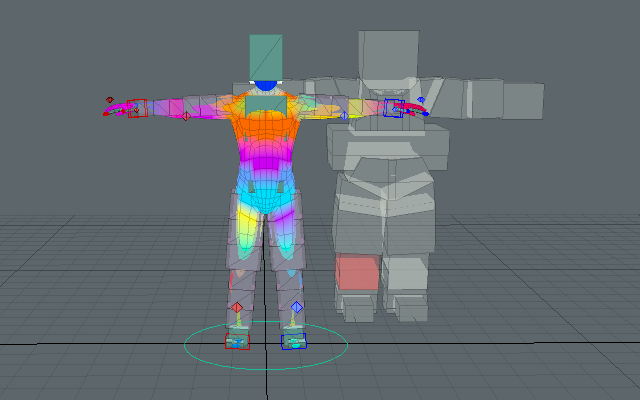
5. Generate Weight Meshes
We generate a weight mesh for building weight maps.
- We choose a rig item.
- We click [Generate Weight Meshes] in the Main Palette.
A weight mesh with weight maps that have the same names as the skeleton items is generated.
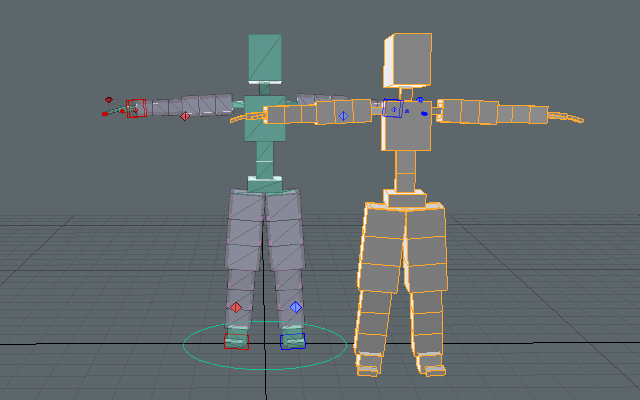
- We edit the weight mesh.
We edit the weight mesh polygons so that they cover the mesh item to which we wish to transfer the weights.
We don't need the weight maps applied to the segments' parent items so we delete their polygon meshes.
Please make sure that if subdivisions are used in the mesh item, the vertices in front of the subdivisions are located inside the boxes.
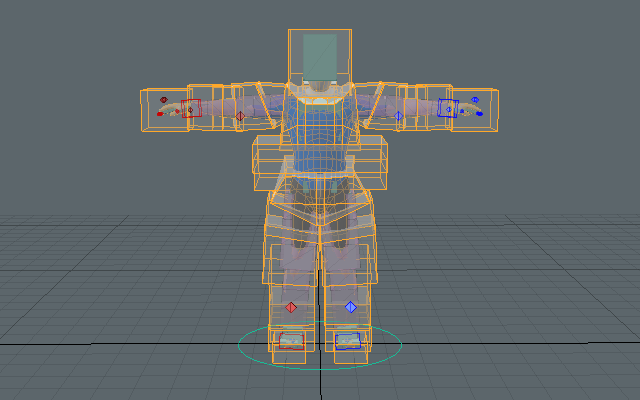
6. Bind
We execute Bind to make the mesh deformable.
- We execute Bind.
We select the weight mesh and mesh item and click [Bind] in the Main Palette.
The transfer of the weight maps from the weight mesh to the mesh item is done with world coordinates. Bind must be executed with the weight mesh and mesh item overlapping in Setup Mode.
Bind can transfer multiple weights in one operation by selecting multiple mesh items.
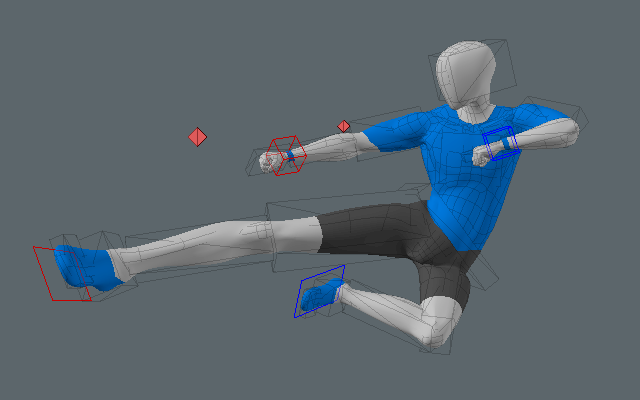
- We review the deformation.
We check that the weight transfer was executed as planned by moving the rig. Adjust the rig functionality as required.
[Bind] can be executed any number of times. Edit the weight mesh until the weight maps can be transferred as you planned.
CBOX rigs can also use Modo's standard [Bind].
7. Adjust Weights
We fine tune the weight maps.
- We adjust the weight maps.
For complicated model data, it can be difficult to set the weights as planned with only weight meshes. In such cases, use Modo's [Vertex Map Tools] to adjust the weights.
If the model is bilaterally symmetrical, you can adjust the weight maps efficiently by using the [Mirror Weight Tool].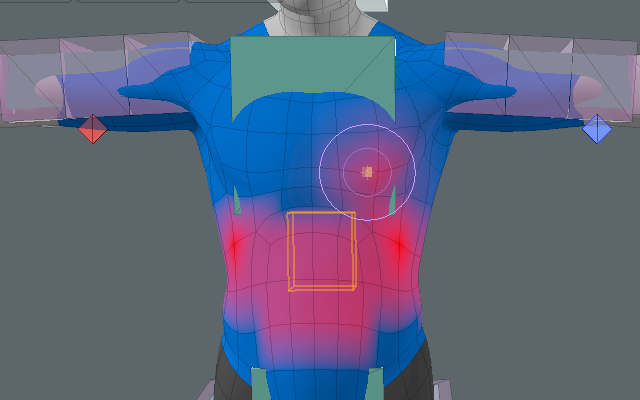
8. Create Pose / Animation
The preparations for creating animations are completed once we finish adjusting the weights.
We can create keyframe animation using the [Position], [Rotate] and [Scale] tools.
CBOX rig functionality has features such as those below which are suitable for creating animations.
- Skeleton color and transparency can be changed with the [RigItem] and [SegmentItem] materials.
- When 2DIK or spline IK is enabled, skeleton item movement acts as an offset.
- Segment items behave as though parent item position and rotation inheritance was OFF.
CBOX assumes the use of Modo's [Action] and [Reference] to create animations. However, there are a number of restrictions to Modo's [Action] and [Reference]. It is necessary to understand Modo's specifications to pleasantly create animations. Below are supplements relating to Modo's specifications.
Please refer to the sample scenes if you wish to customize CBOX rigs.
- Refer to SampleFilesRigAdvancedCustomRig.lxo for advanced CBOX rig customization.
- You must be careful if you link directly to the transform in a rig controlling with the transform of a chest item or other skeleton. This is because when you link to channels, you overwrite the Setup Mode values. Refer to SampleFilesRigAdvancedTailRig.lxo if you wish to link to skeleton item transforms.